Making an interactive scene with the Interactivity Toolkit
The interactivity toolkit can be remixed to make games with unique interactions, moveable decorations, player poses and so much more. This kit is a great base for roleplaying games, immersive scenes, decorating games, and storytelling.
Getting Started
Remixable Template
Remix this game to have a base to start your own Interactive game.
For more inspiration, check out this game to see a bigger world made using this toolkit.
Features of this kit
- A small scene with interactive items
- Items that can be moved by the player when they enter “Build Mode”
- A pose wheel with customizable poses
In this toolkit, Build Mode and item placement is handled by the Item Placement Manager script located on the Build Mode Manager entity. This script controls item placement and you can change properties on this script to customize how item placement works in your game.
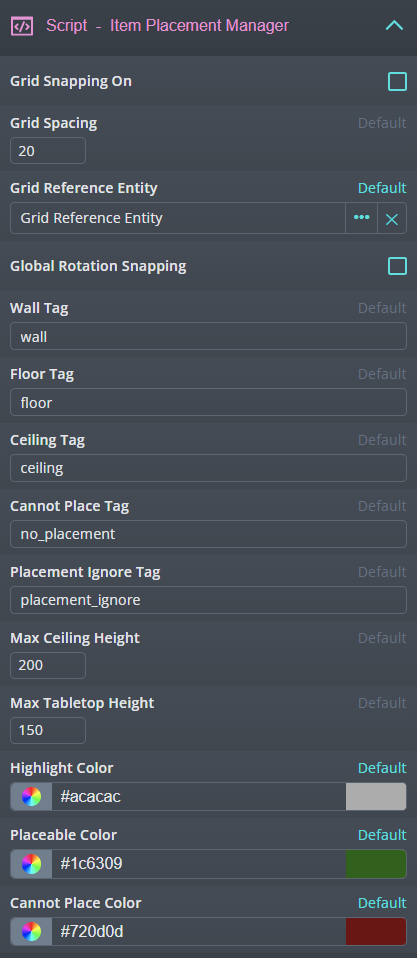
By default, build mode is toggled when you press B or the UI button on the screen, but this hot key can be changed on the Item Placement Manager script by changing the Build Mode Hotkey property. On this script, you can also change the highlight colors of placeable items, the tag names, the max ceiling height, and whether or not the aiming reticle is visible.
Setting up your scene
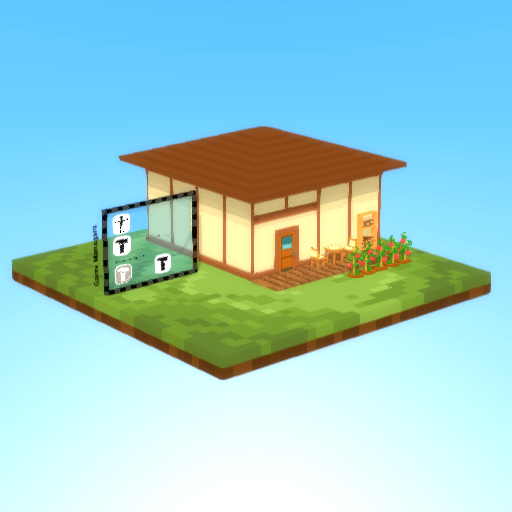
Before you start filling up your world with moveable and interactable items, you will want to properly set up your scene with walls and floors that you can place items on. In the example scene, you’ll find a small house with floors, walls, and a ceiling. Each of these building parts are tagged either floor, wall, or ceiling so moveable items can properly be placed on them. You can add your own floors by dragging in a new floor Voxel Object and adding the floor tag to it, or you can duplicate the floors that are already in the scene. The same can be done to add more walls or ceilings. Here is an in depth look at the different tags that you will want to use when setting up your scene:
Tags
The Item Placement Manager uses tags to determine where different types of items can be placed. These are the default tags that this script will look for when determining whether or not an item can be placed at a given location.
Moveable Tag - “moveable”
- This tag is automatically added to all entities with a Moveable Item script. Marks the entity as moveable
Wall Tag - “wall”
- Add this tag to an entity to indicate that it is a wall. Wall-type items can be placed on walls and walls serve as boundaries for a room.
Floor Tag - “floor”
- Add this tag to an entity to indicate that it is a floor. Floor and tabletop items can be placed on floors.
Ceiling Tag - “ceiling”
- Add this tag to an entity to indicate that it is a ceiling. Ceiling items can be placed on ceilings.
Cannot Place Tag - “no_placement”
- Add this tag to an entity to prevent moveable items from being placed on it or intersect with it. Use this tag to indicate an entity that you never want moveable items to be able to intersect with.
Placement Ignore Tag - “placement_ignore”
- Add this tag to an entity that moveable items can be placed on or intersect with regardless of item type. This tag will tell the moveable item to ignore the entity and the item will still be placeable while intersecting with the entity.
Room Tag
- You can optionally add a room tag to all boundary entities in a room to limit which items can be placed in a particular room.
If you want to change these tag names, you can change them on the Item Placement Manager script.
Once you are happy with the layout of your scene and everything is properly tagged, you’re ready to start adding decorations to your scene.
Making a Moveable Item
Making an item you can move around is simple - just add the Moveable Item script!
Set the Item Type to determine how the item will behave when you move it.
Floor items can be placed on top of entities with the floor tag
Wall items can be placed flat against entities with the wall tag
Ceiling items will hang down from entities with the ceiling tag
Tabletop items can be placed on entities with the tabletop or floor tag
Rug items can be placed on entities with the floor tag and can intersect with floor items
Moveable Item Properties
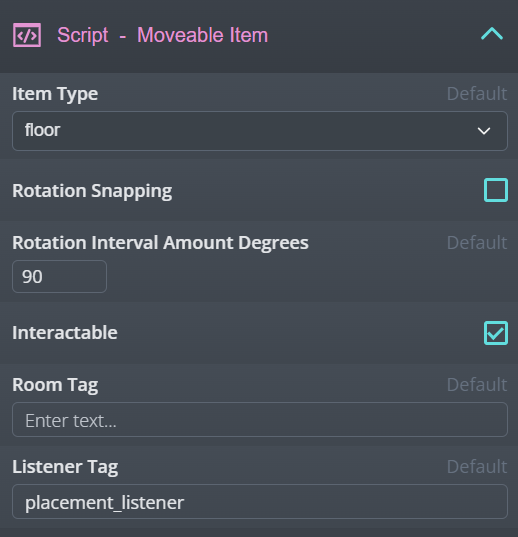
- Rotation Snapping - Turns off free rotation
- Rotation Interval Amount Degrees - How many degrees the entity rotates when R key is pressed
- Interactable - Whether the item is interactable. Will ensure that you can’t interact with the item while moving it
- Room Tag - Optional property, the item will only be able to be placed on walls or floors with this tag on it
- Listener tag - Receives events when an item is placed
Moveable items can be moved once the player has entered Build Mode. Once you have made a couple moveable items, it’s time to start making them interactable to add some depth to your world.
Making an Interactable Item
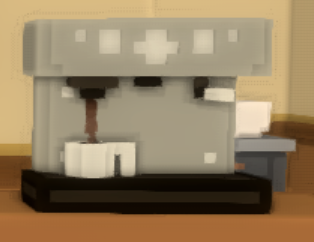
Making an item you can interact with is simple, there are a handful of scripts you can mix and match to set up most simple interactions.
For example, you could add the scripts Simple Interaction - Toggle Voxel Object and Simple Interaction - Toggle Play Sound to make a TV that you can turn on and off, or add the scripts Simple Interaction - Toggle Particles and Simple Interaction - Toggle Voxel Object to make a faucet that turns on and off.
The following scripts can be added to any entity to make simple interactions:
Simple Interaction - Toggle Voxel Object: Swaps between two voxel objects.
Simple Interaction - Toggle Play Sound: Turns a sound on an off. The entity needs a sound component for this to work.
Simple Interaction - Toggle Play Spatialized Sound: Turns a spatialized sound on and off. The entity needs a sound component and a dbb_spatialized_audio_hack script for this to work.
Simple Interaction - Toggle Particles: Turns a particle effect on or off. The entity needs a particle component for this to work.
Simple Interaction - Toggle Play Animation: Stops and starts the voxel object animation.
Simple Interactive - Toggle Transform Animation: Stops and starts a transform animation. Works in conjunction with the scripts dbb_sine, dbb_scale_wobble, dbb_rocking_motion, dbb_spin.
Simple Interaction - Toggle Skeletal Object: Swaps between the player avatar and a different skeletal object.
Simple Interaction - Play Spatialized Sound: Plays a spatialized sound once. The entity needs a sound component and a dbb_spatialized_audio_hack script for this to work.
Simple Interaction - Iterate Through Voxel Objects: Iterates through an array of voxel objects in order.
Simple Interaction - Iterate Through Skeletal Objects: Iterates through an array of skeletal objects on the player in order.
Add as many Furniture Interaction scripts to a single entity as you like - they can be combined to make interesting interactions. All of these scripts are used in the example scene - click on the different interactable decorations to see how they are used and how you can customize them yourself.
Optional Grid Snapping
You can optionally make all of your movable objects snap to a grid rather than move freely.
- First, on the Item Placement Manager, mark Grid Snapping as true.
- Next, you’ll want to choose a Grid Reference Entity. This is just an entity that is positioned in the orientation that you want your grid to be in. You could use one of your walls or floors, or you could drag in a new entity that faces in the right direction. Set this as your Grid Reference Entity on the Item Placement Manager
- Set your Grid Spacing to your desired spacing amount. The default spacing is 20 units.
- You can optionally turn on Global Rotation Snapping, which will turn on rotation snapping on every moveable item in the game. While this property is optional, I highly recommend turning it on.
Build Mode Button UI
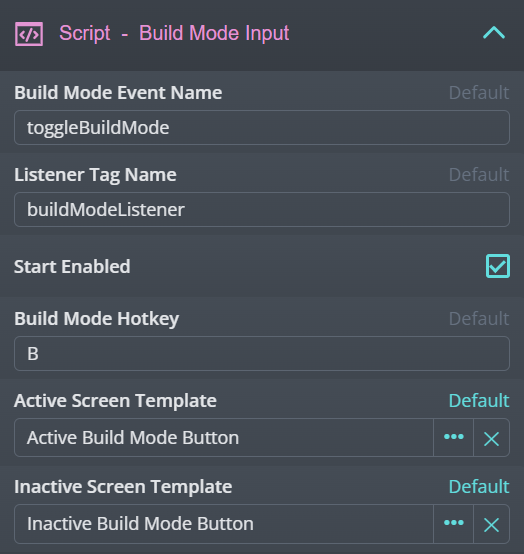
The Build Mode UI button is displayed on screen via the **Build Mode Input **script on the Build Mode Manager entity. You can change the properties on this script to customize the build mode toggle button you see on screen. If you make your own UI buttons, you can display them by setting the Active Screen Template and Inactive Screen Template to your respective template refs.